
Use this guide to find out how you can enter a tour consisted out of charter flights or buses and determine stages of the tour, defined as entering transports and accommodation in exact time periods during the tour. Set the departures of the tour easily by allowing them to be repeated in equal time intervals, every time with the same scenario.
Prerequisites
For the Advanced tour entering, you should already have an accommodation available in the tour dates loaded. See How to enter an Accommodation guide.
Creating an Advanced tour
Start with entering an advanced tour by choosing Tours → Advanced Tours from the main menu.
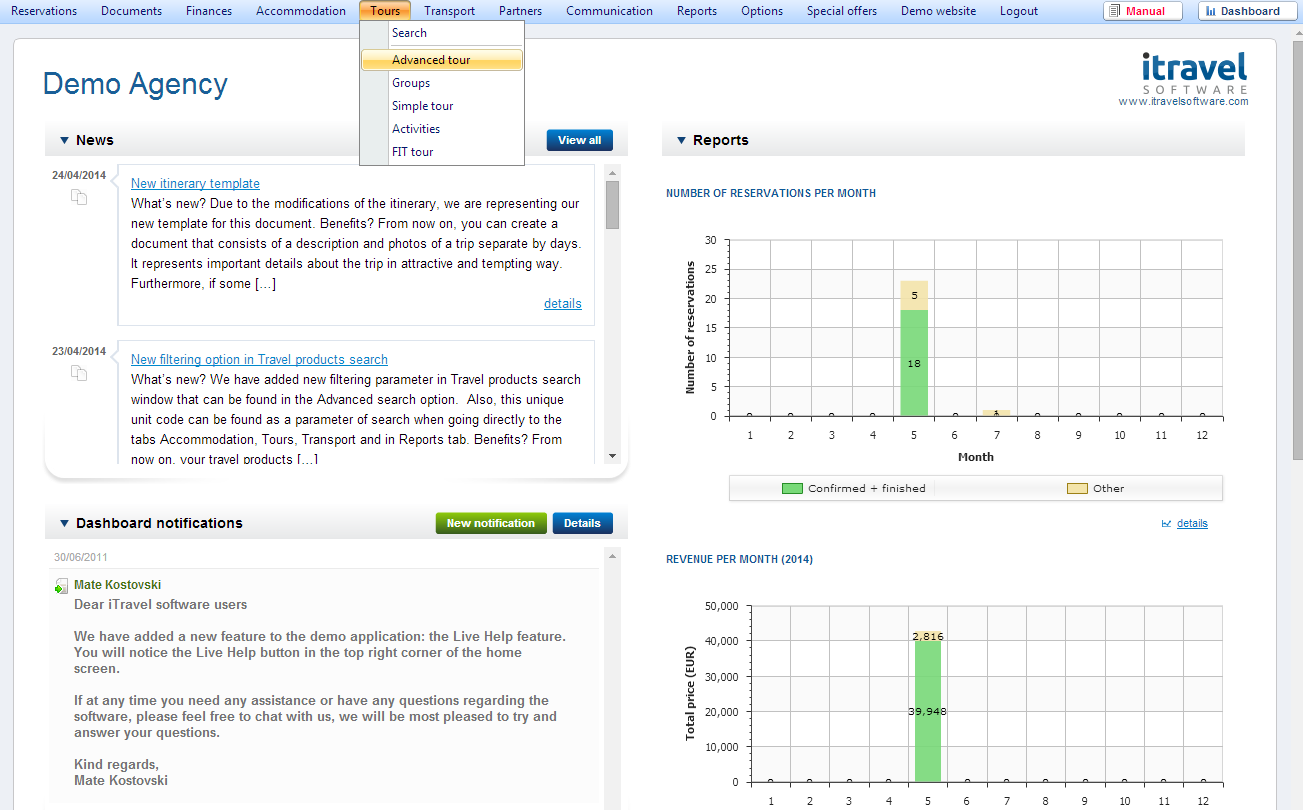
The Advanced tour grid has opened, where you can find every advanced tour unit which is loaded in the system. To add a new advanced tour, choose ![]() .
.

The New object window has opened. Use this window to add general information about the unit you are creating. First, fill in all necessary data.
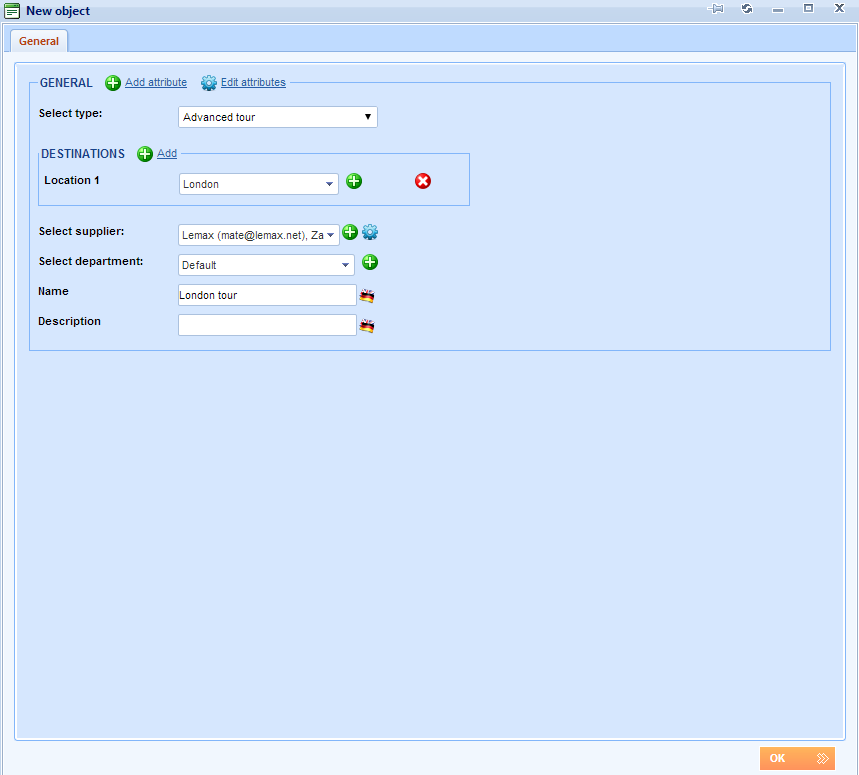
Select a destination by choosing existing one from the Location drop down list or add a new destination with the ![]() Plus icon. (See: How to enter destinations)
Plus icon. (See: How to enter destinations)
Choose the existing supplier by typing a name (e.g. Lemax) or add a new one with the ![]() Plus icon.
Plus icon.
Fill in other data as name of the tour and description.
Click to save general information about the tour.
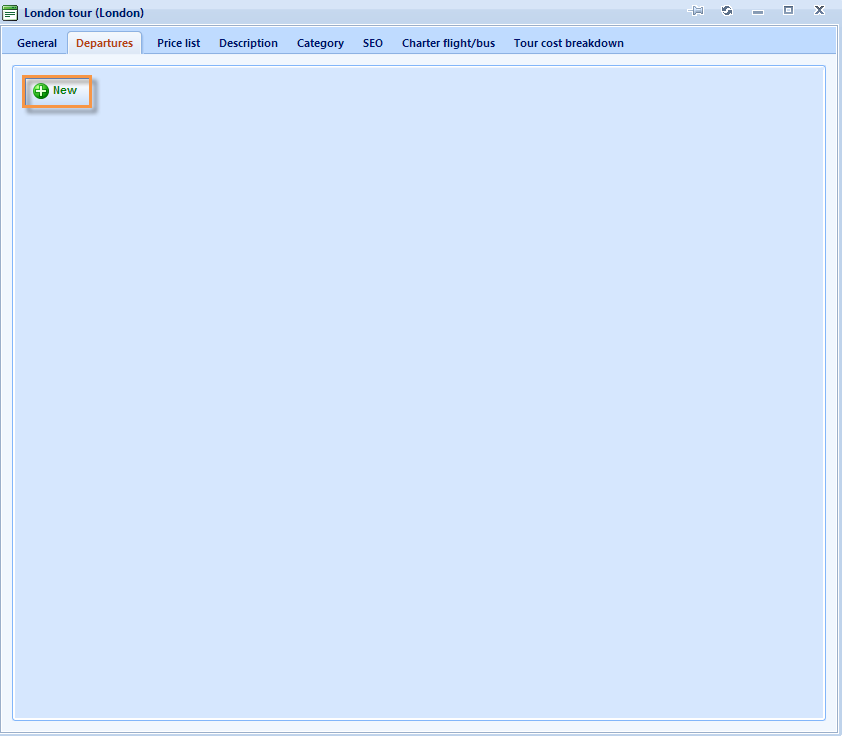
Advanced tour has been added to your database and additional tabs have appeared in the advanced tour editing window.
Continue with an Advanced tour creation by choosing Departures tab after defining general information and clicking ![]() to create a new departure.
to create a new departure.
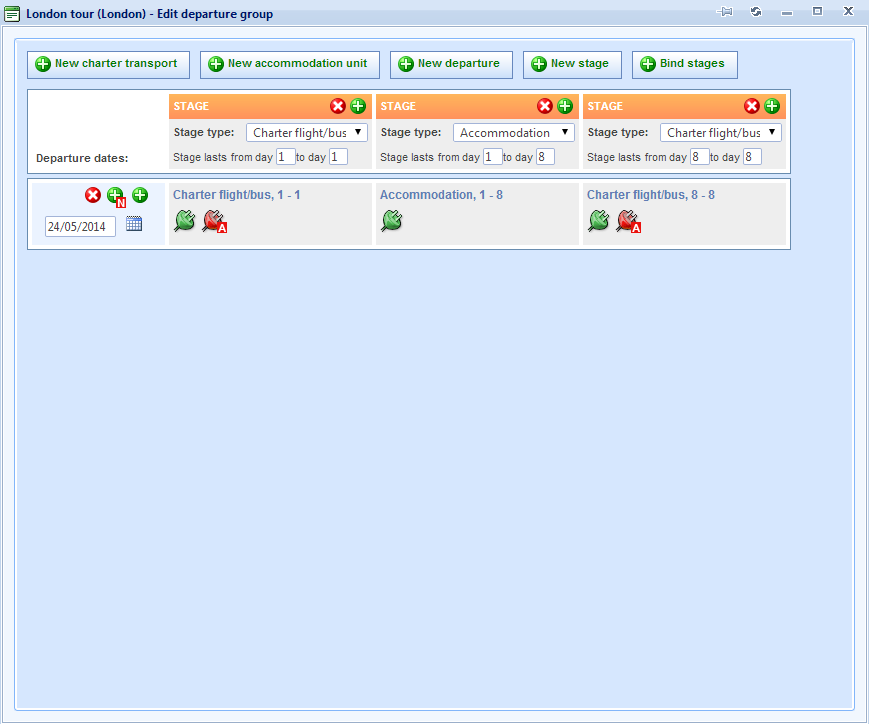
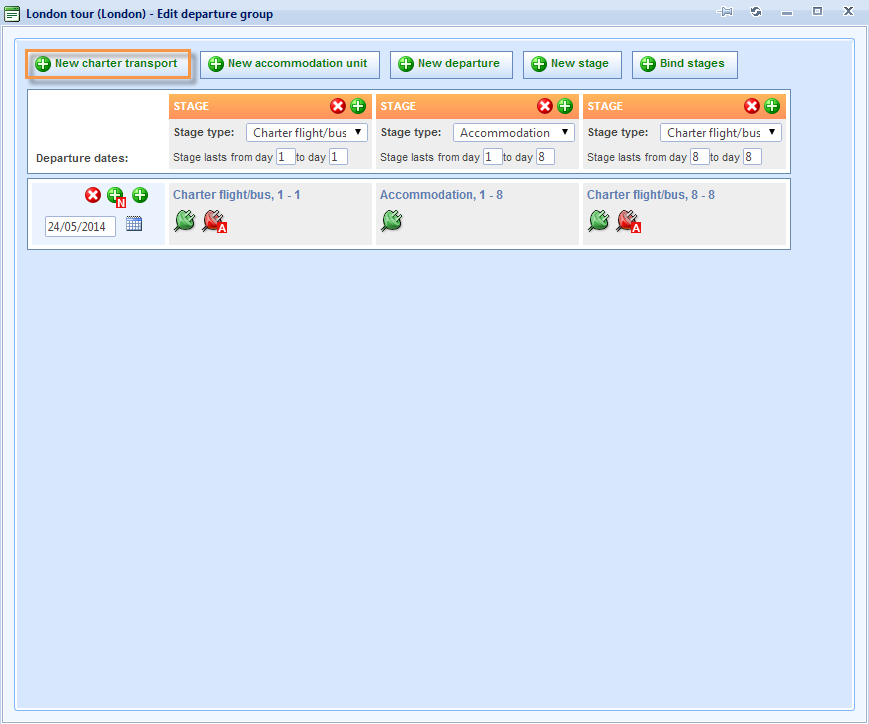
An Edit departure group window will appear from where you can create your charter flights or buses and edit departure time schedules through stages.
First, let’s start with adding a new charter flight or bus.
Entering charter flight/bus
To create Advanced (charter) tour, you should define your charter transport. The beginning of the tour is defined with the departing transport and the end with returning transport. Use this chapter to find out how to create Charter flight or bus departures and returns and how to easily make more copies of it which will be used as charter transports in all tour dates later on.
Choose ![]() to add charter flight/bus.
to add charter flight/bus.
A New object window will appear.
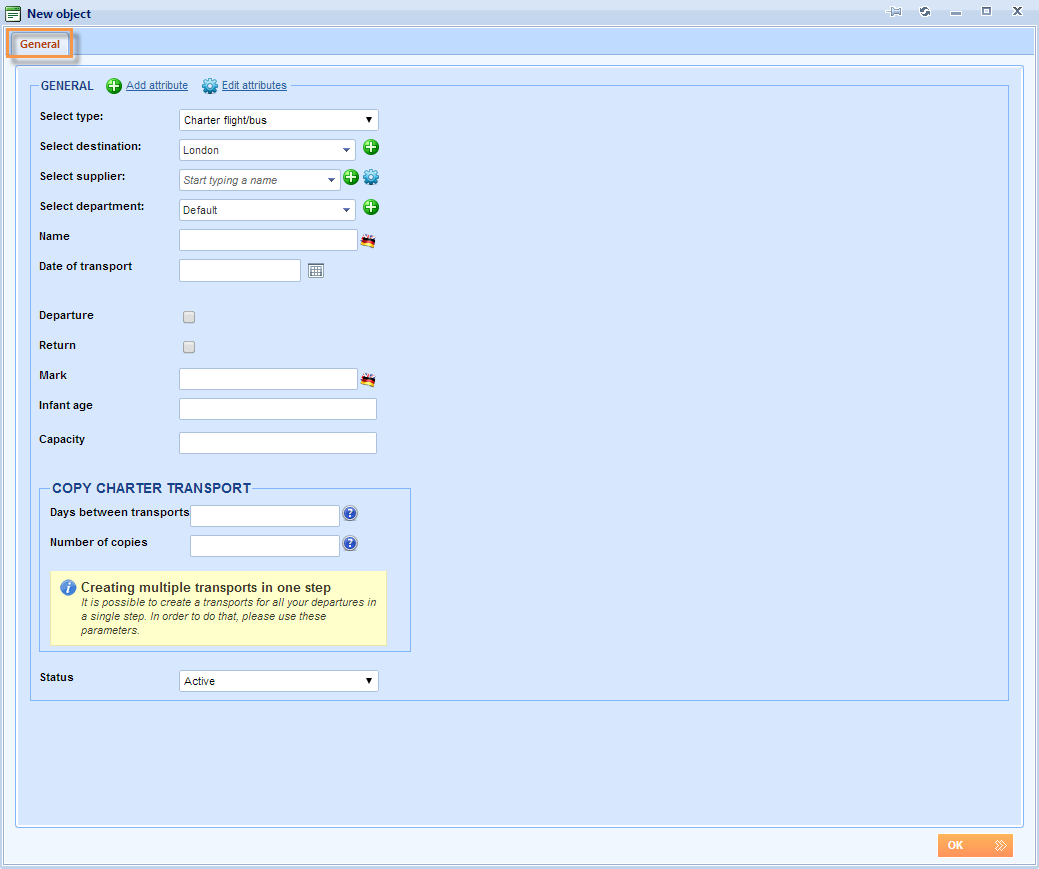
Start with defining general information in the General field.
Select a destination by choosing existing one from the Select destination drop down list or add a new destination with the ![]() Plus icon. (See: How to enter destinations)
Plus icon. (See: How to enter destinations)
NOTE: The destination of the charter flight/bus should be the same as the destination of the advanced tour it is going to be used in. If this is not the case, it will not be possible to automatically bind charter flight/bus to a flight/bus stage.
Choose the existing supplier by typing a name (e.g. Lemax) or add a new one with the ![]() Plus icon.
Plus icon.
Enter the name of the charter flight/bus (e.g. London – Paris).
Choose the date of the charter flight/bus.
Using the Departure and Return check boxes select Departure for this charter flight to create transport departure units.
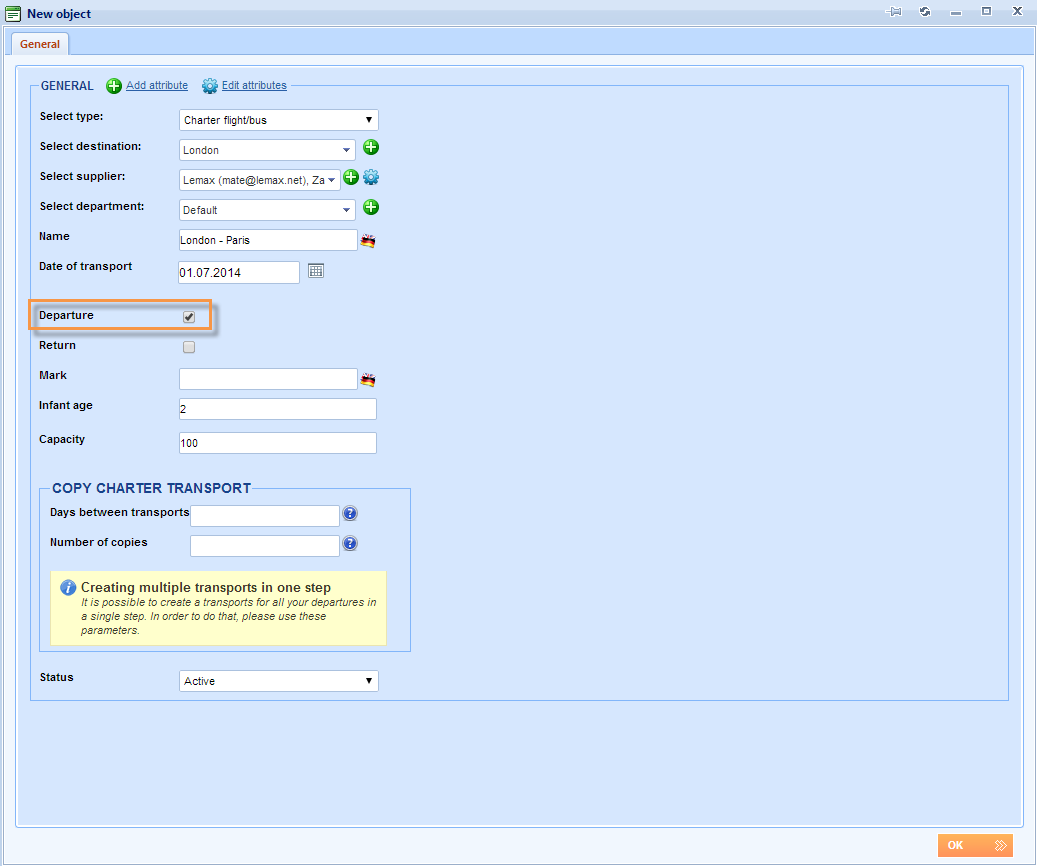
Enter the mark of the charter flight/bus (like a flight number or a bus licence plate).
Enter the infant age (age of a child considered not to take seats in the transport)
Enter the capacity of this charter flight/bus to finish with defining general part of creating charter flight/bus.
Continue with defining information for easily copying created transport to another dates what will make copying tour departures simple by just choosing already created copies of the flight. Locate Copy charter transport field.
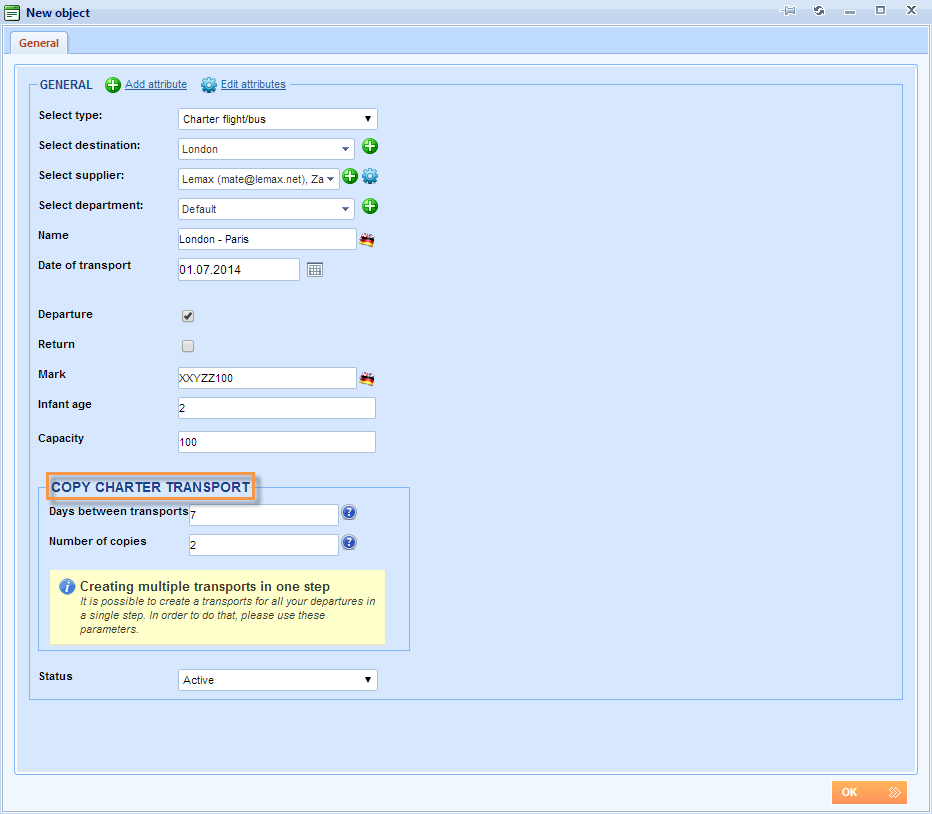
Set the Copy charter flight/bus parameters:
Enter the Days between transports to define the number of days between charter flight/buses.
If you have charter flight/bus each 7 days, then the number of days between charter flights/buses is 7.
Enter the Number of copies to define the number of charter flights/buses which are to be generated not including the original.
NOTE: If you want to have charter flights/buses leaving on 01.07., 08.07. and 15.07. then you create the original flight on 01.07., select the number of days between departures to be 7 (8 – 1 = 15 – 8 = 7), and select the number of copies to be 2 (the original charter flight/bus on 01.08. plus two more copies).
Click to save multiple departure charter transport in one step.
To create charter transport returns, repeat the process as for departures.
Choose ![]() to add charter flight/bus.
to add charter flight/bus.
Define all needed information in the General field and in the Copy charter transport field.
Provided information in this part should be adjusted to the real transport return data. This means you should select the date of the first return and select Return for this charter flight to create transport return units using the Departure and Return check boxes.
NOTE: To set the first date, use the difference between the set date in the transport departure (in this example 1.7.) and the number of days in the Days between transports text field (in this example 7). That makes the first returning date 8.7.)
Enter the name of the charter flight/bus (e.g. Paris – London) for the return transport.

Define Copy charter flight/bus parameters with the same data to be matching to the departing transport.
Click to save multiple departure charter transport in one step.
Creating a new departure
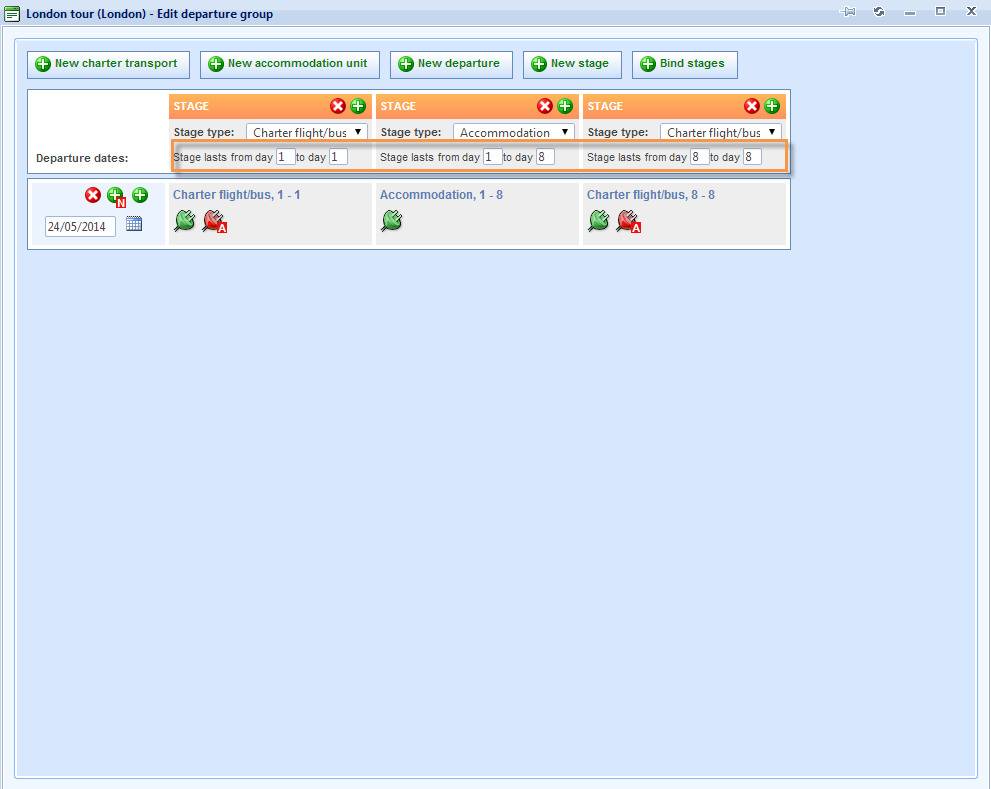
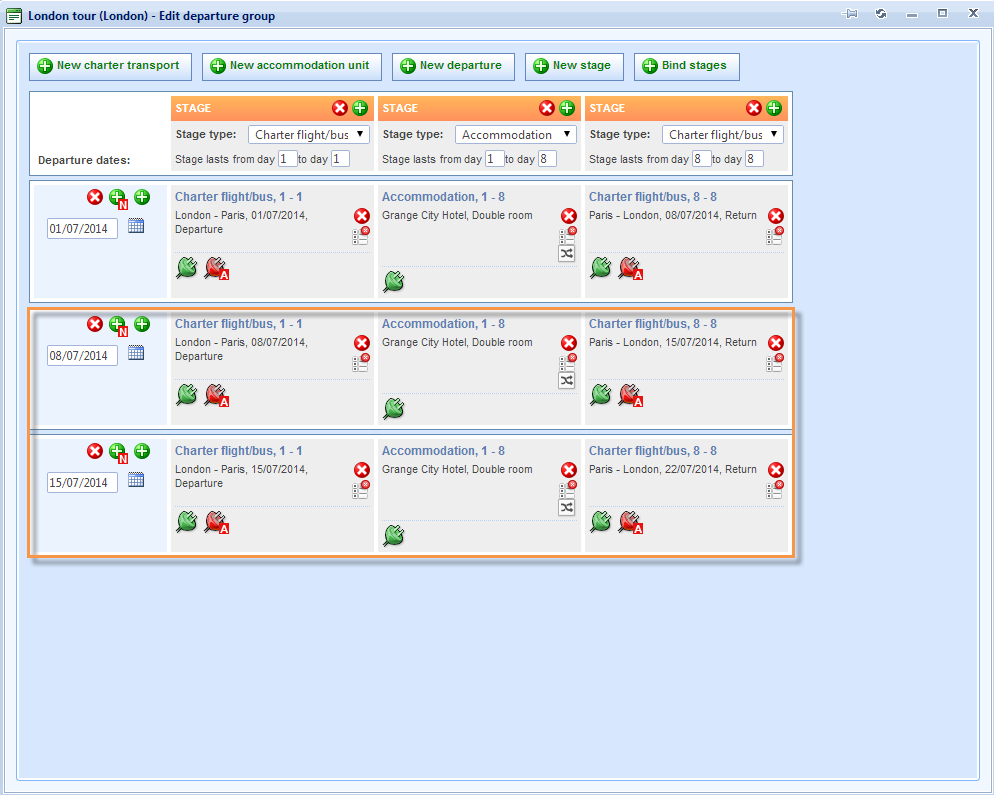
You are now back in the Edit departure group window. In Lemax system, departures are grouped in Departure groups. One departure group consist of more departures that have same duration.
Continue with defining an advanced tour by creating departures using simple example consisted out of two transport stages and one accommodation stage. Find out how to create more complex advanced tour in related links in the end of this guide.
NOTE: In the flight/bus stage it is possible to link to charter transport, such as busses or airplanes. In the accommodation stage it is possible to link to accommodations such as hotels or apartments.

In the Stage column header change the values of Stage start and Stage end parameters. These parameters are the two text boxes in the ‘Stage lasts from day ___ to day ___’ phrase.
NOTE: The start day cannot be greater than the end day.
For accommodation stages the end day needs to be greater than the start day (accommodation assumes you have an overnight stay).
For this example, we can leave this time schedule because our transports are created with 7 days intervals between each. (It is actually 8 days because first and last out of 7 are considered).
Define the departure date using the date picker. For this example, we will use 1.7. because departing charter transport is created for this date.
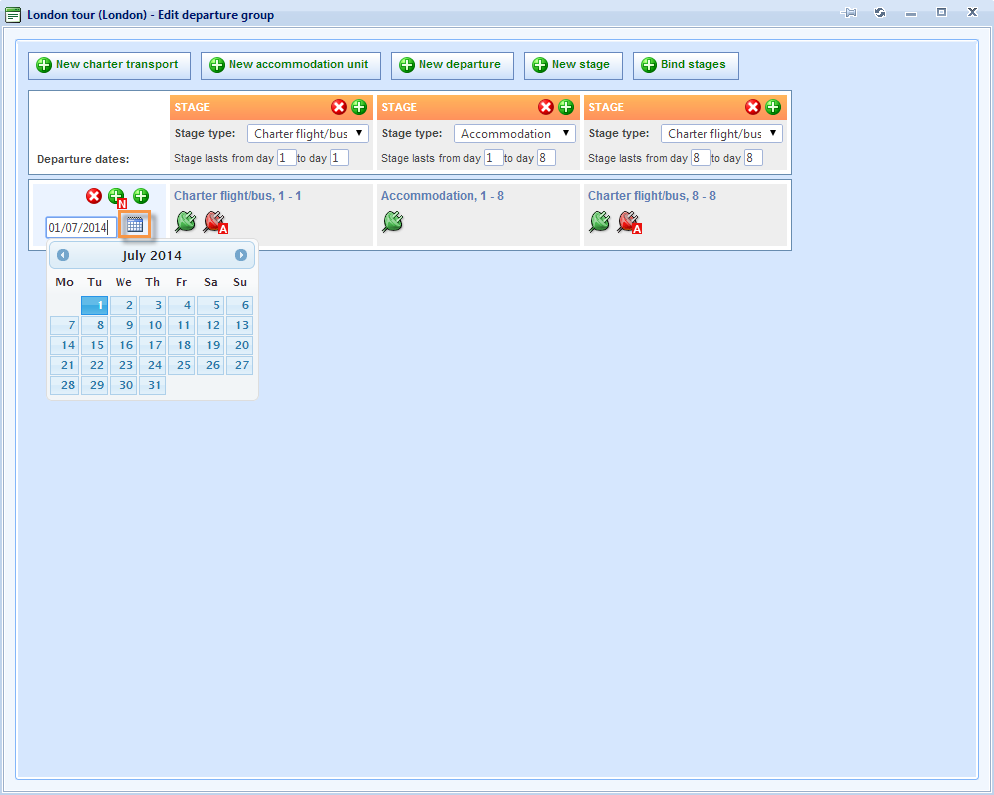
You should add your flight in the first stage, which is the first day of the tour. Choose ![]() .
.

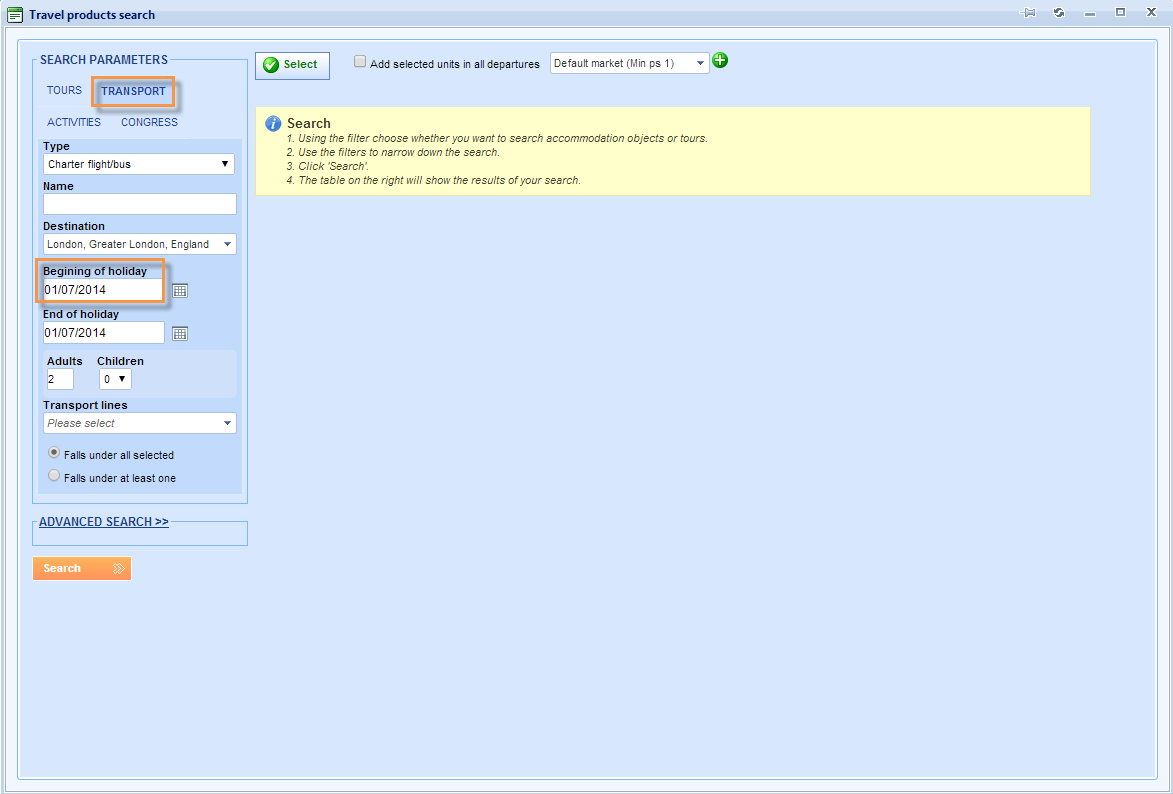
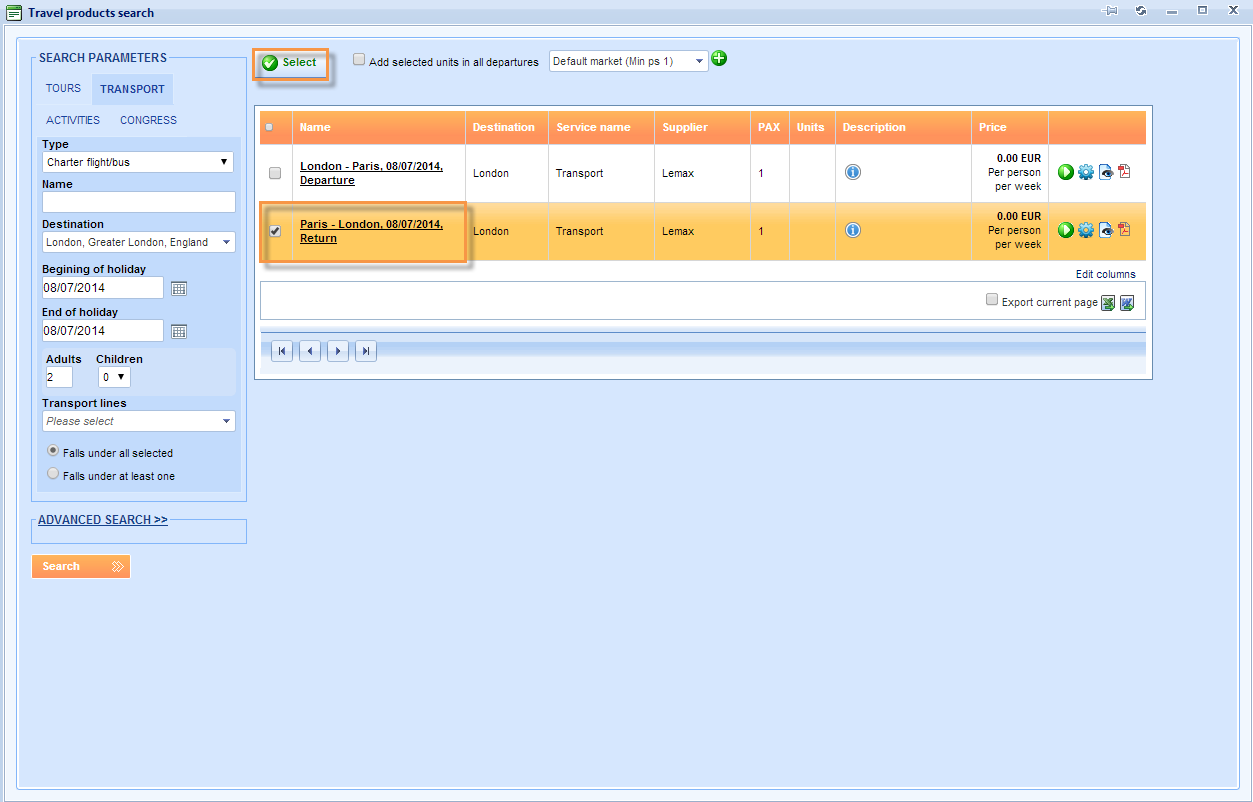
A Travel product search window will appear, with automatically selected Transport as the first parameter for the search and Beginning of holiday 01/07/2014 as the second parameter (because of the previously set calendar date of the beginning of the tour)
Click to find the results.
As the result, you can find previously defined charter flight for departing date.
Select it with the check box in the first column and choose button above the grid to add it in the tour.
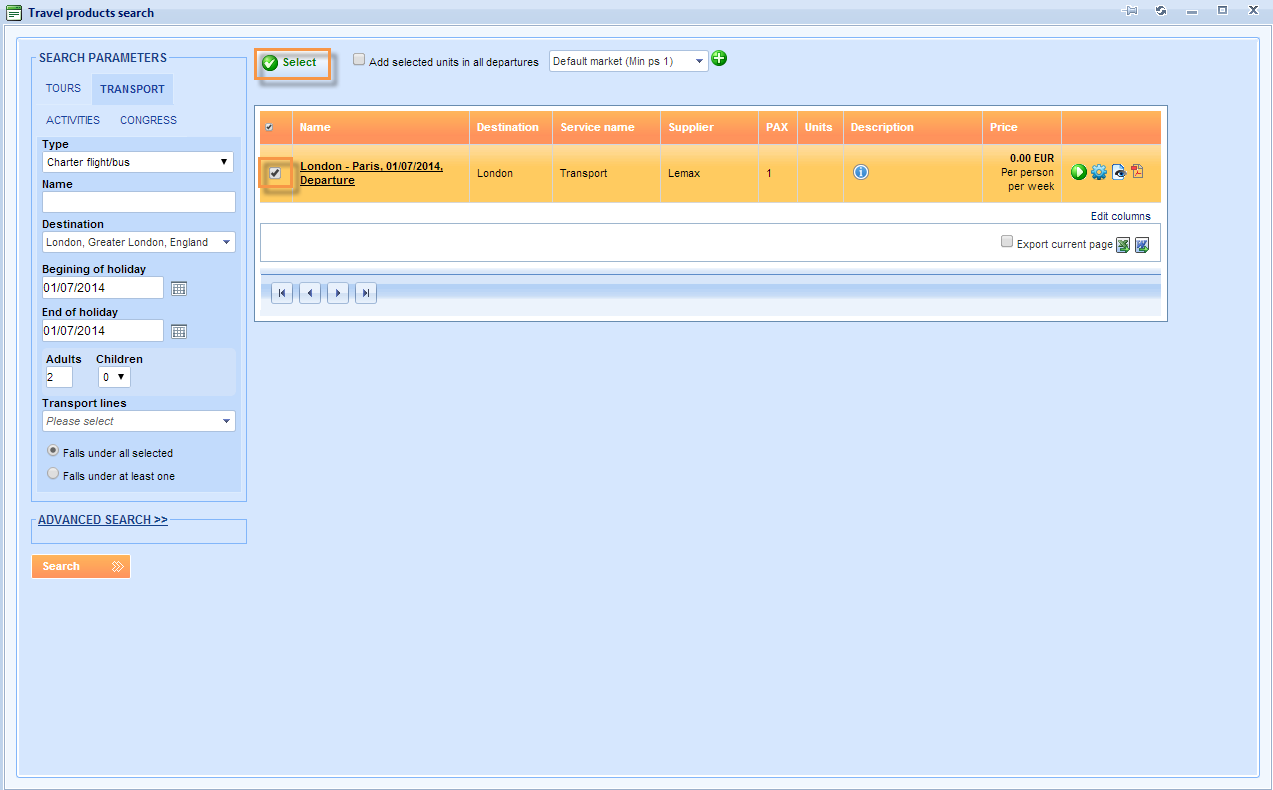
You are back in Edit departure group window where you can see added charter flight in the first stage.
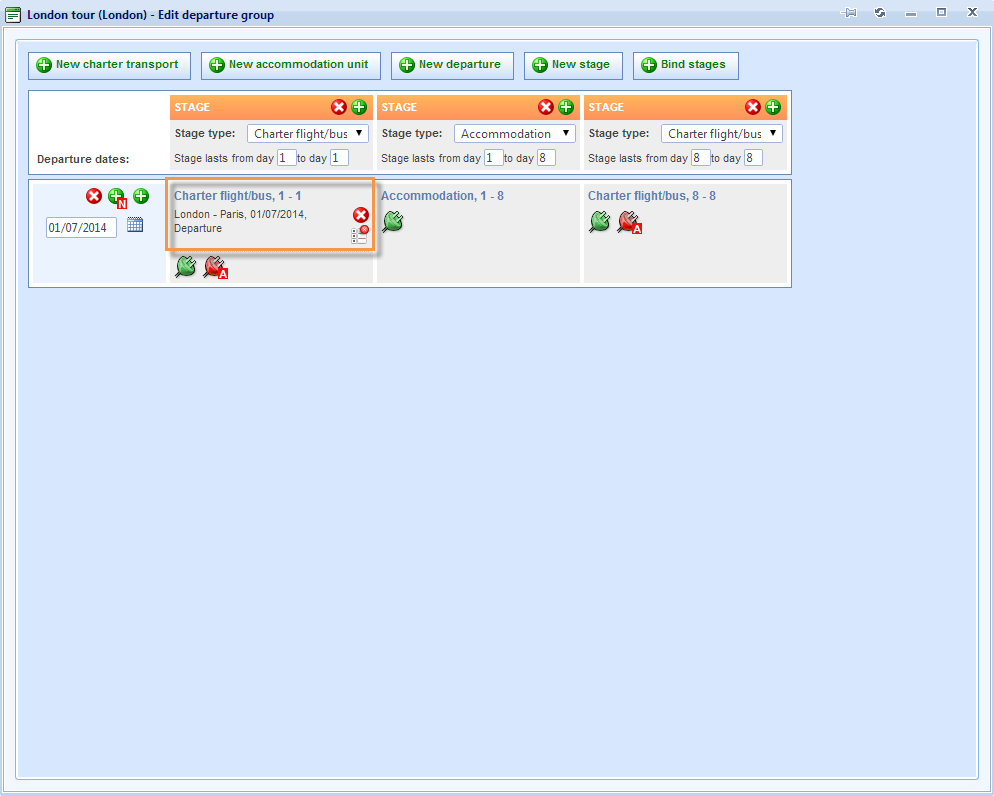
The second stage is defined in the same way. You should add accommodation from day 1 to day 8. Choose ![]() Bind with accommodation icon.
Bind with accommodation icon.

Again, the Travel product search window will appear, with automatically selected Accommodation as the first parameter for the search and Beginning of holiday 01/07/2014 as the second parameter (because of the previously set calendar date of the beginning of the tour) and End of holiday 08/07/2014 (the accommodation stage is set to last from day 1. to day 8. and the duration of the holiday is 01/07/2014 – 08/07/2014 according to that).
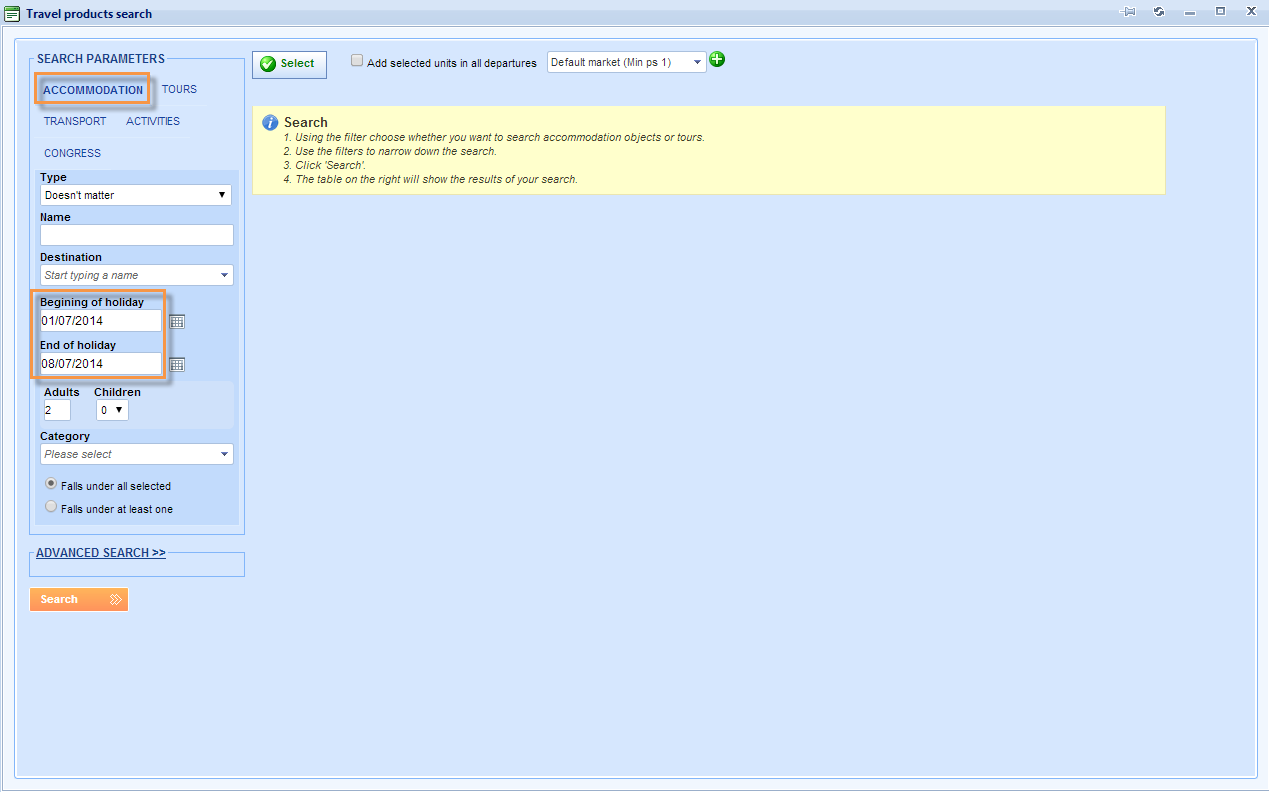
You can select London as the destination if you want to bind accommodation in London with the tour.
Click Search button to find the results.

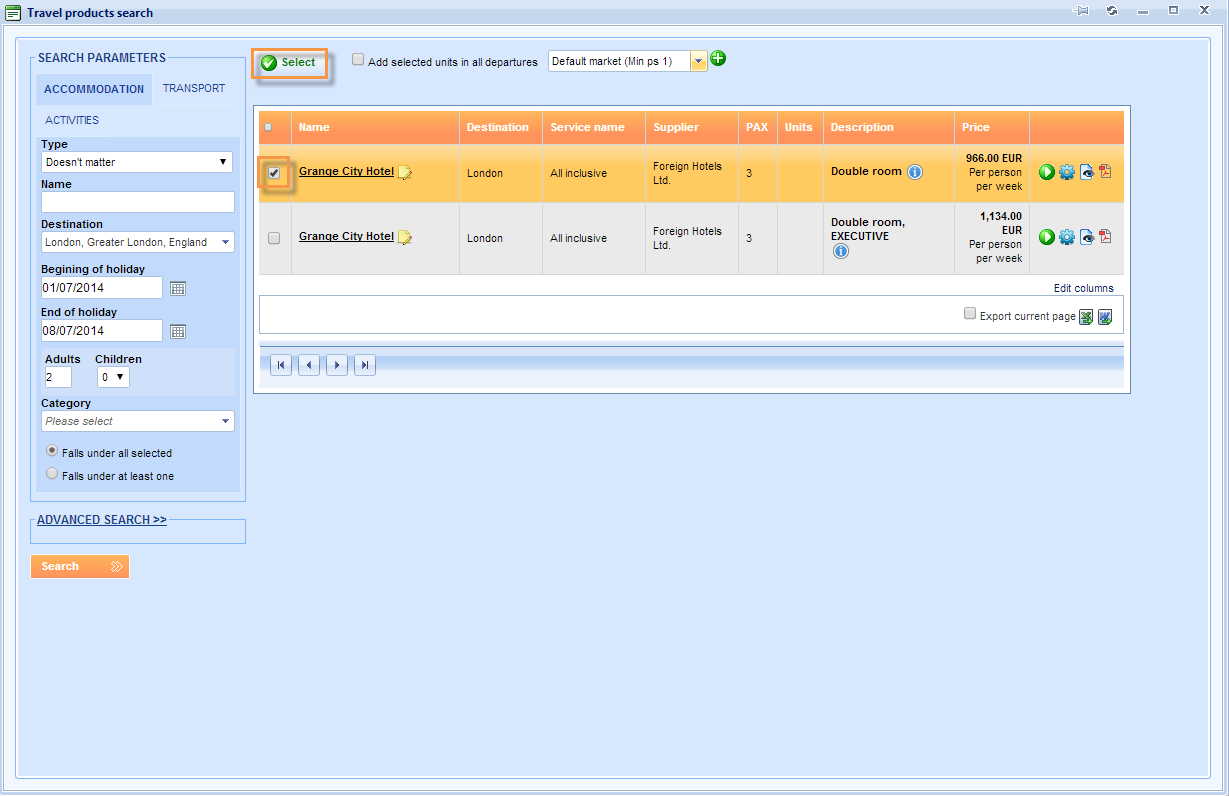
As the result, you can find previously defined accommodation from the database for the set dates.
Select it with the check box in the first column and choose above the grid to add it in the tour.
You are back in Edit departure group window where you can see added accommodation in the second stage.
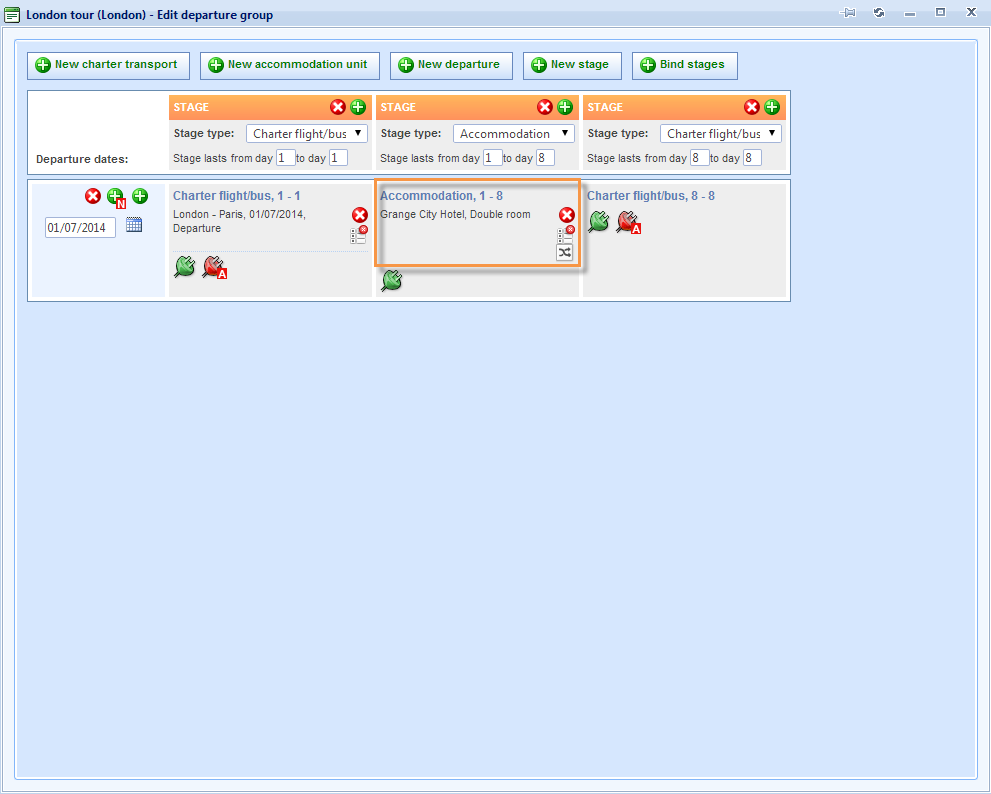
Repeat the process for the last stage, with adding return charter flight. Choose ![]() Bind with transport icon.
Bind with transport icon.

Choose matching flight with with the check box in the first column and choose above the grid to add it in the tour (be careful to choose the Return flight).
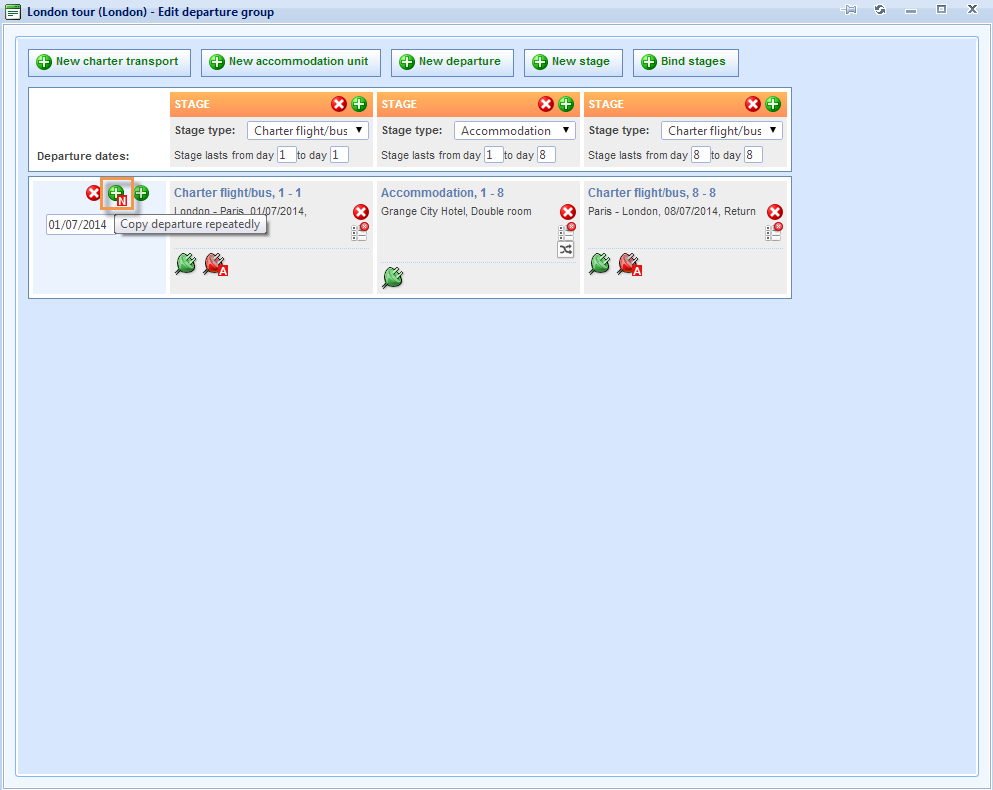
You have successfully created one complete departure for the tour. There are two more charter flights for departing and returning which have to be added as other departures. You can easily add two more departures to this departure group by copying first departure.
Choose ![]() Copy departure repeatedly icon to add 2 more copies (matching by the dates to the created charter flight copies in the beginning).
Copy departure repeatedly icon to add 2 more copies (matching by the dates to the created charter flight copies in the beginning).
Copying departures window has opened. The date of the first available copied charter flight is offered as the beginning of the second departure.
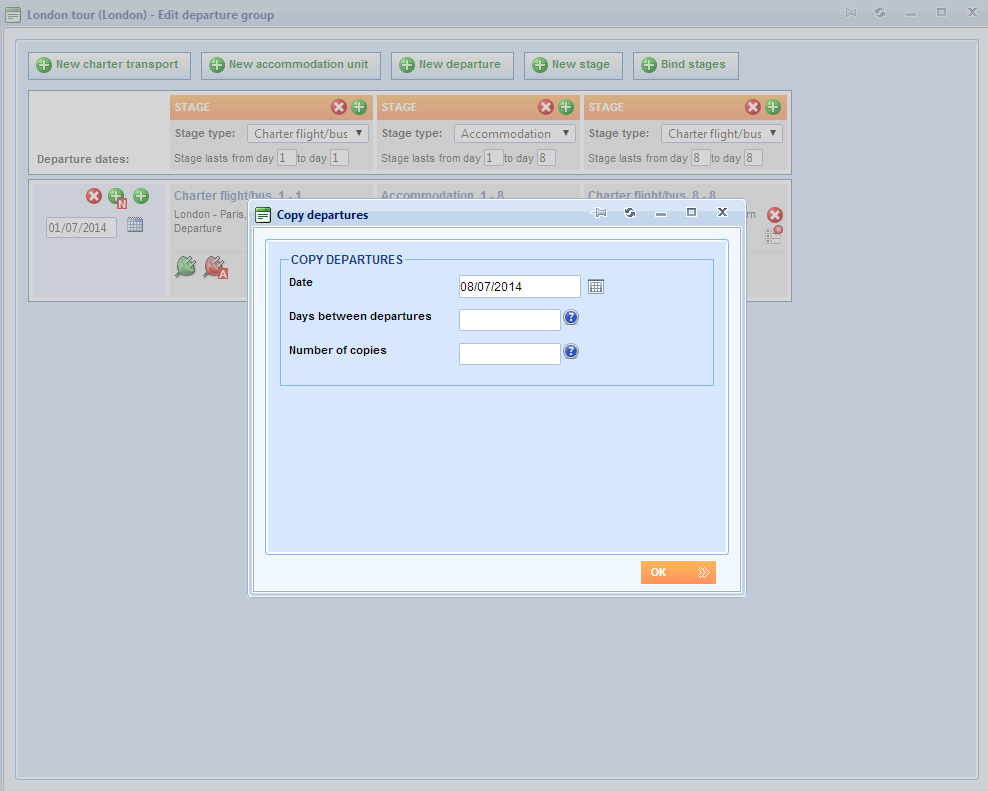
Edit Copy departures details by entering Days between transports to be 7 and Number of copies to be 2 to make it matching with copied charter flights from the beginning. Choose to save changes.
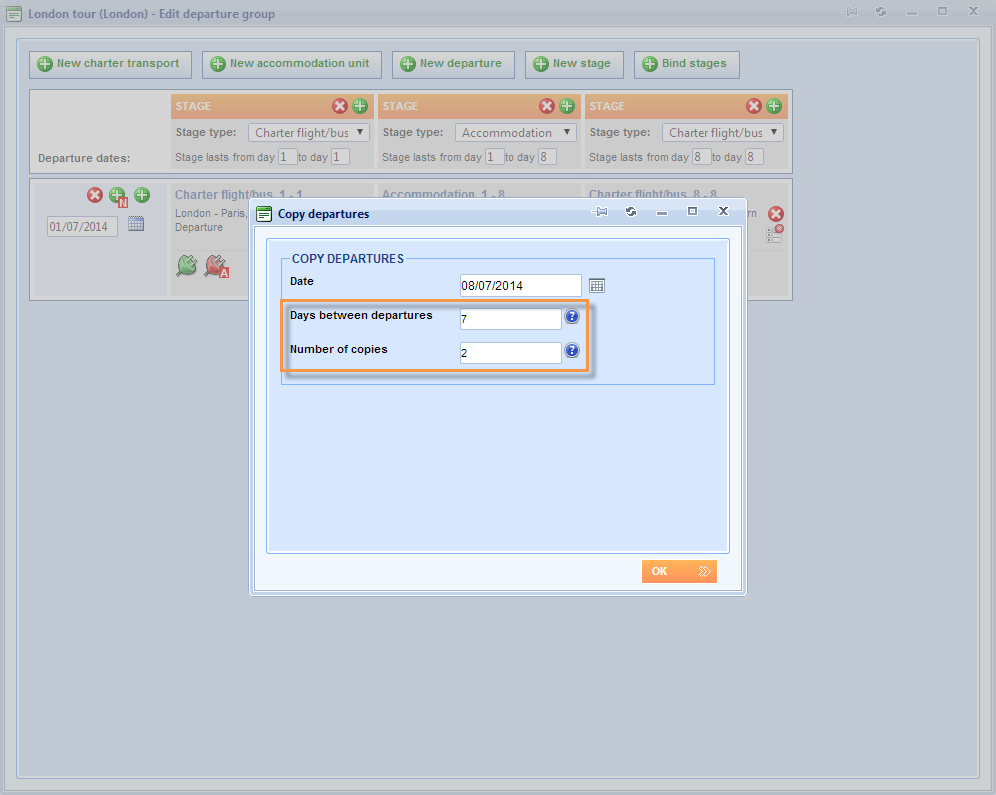
You have successfully added two more departures to this tour. They are matching by the dates (every 7 days) and by the travel products bound in every stage of the tour.
Close Edit departure group window and stay in the tour window to move on with defining expenses.
Defining expenses
Expenses on an advanced tour departure are defined in order for Lemax to help you calculate your net price. Based on the fixed expenses on an advanced tour departure Lemax will calculate the Net factor for that departure and make it available in the advanced tour price list definition.
To start with defining expenses, choose the ![]() Edit a departure icon in the tour window.
Edit a departure icon in the tour window.
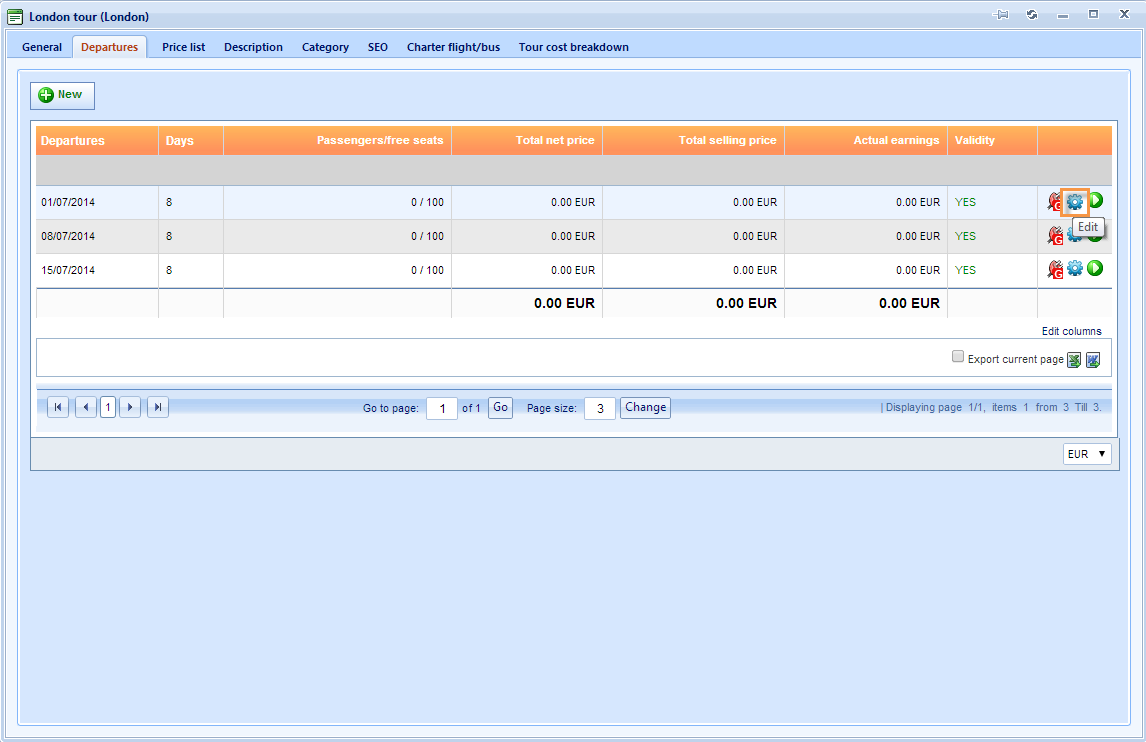
Window with this tour departure details will open.
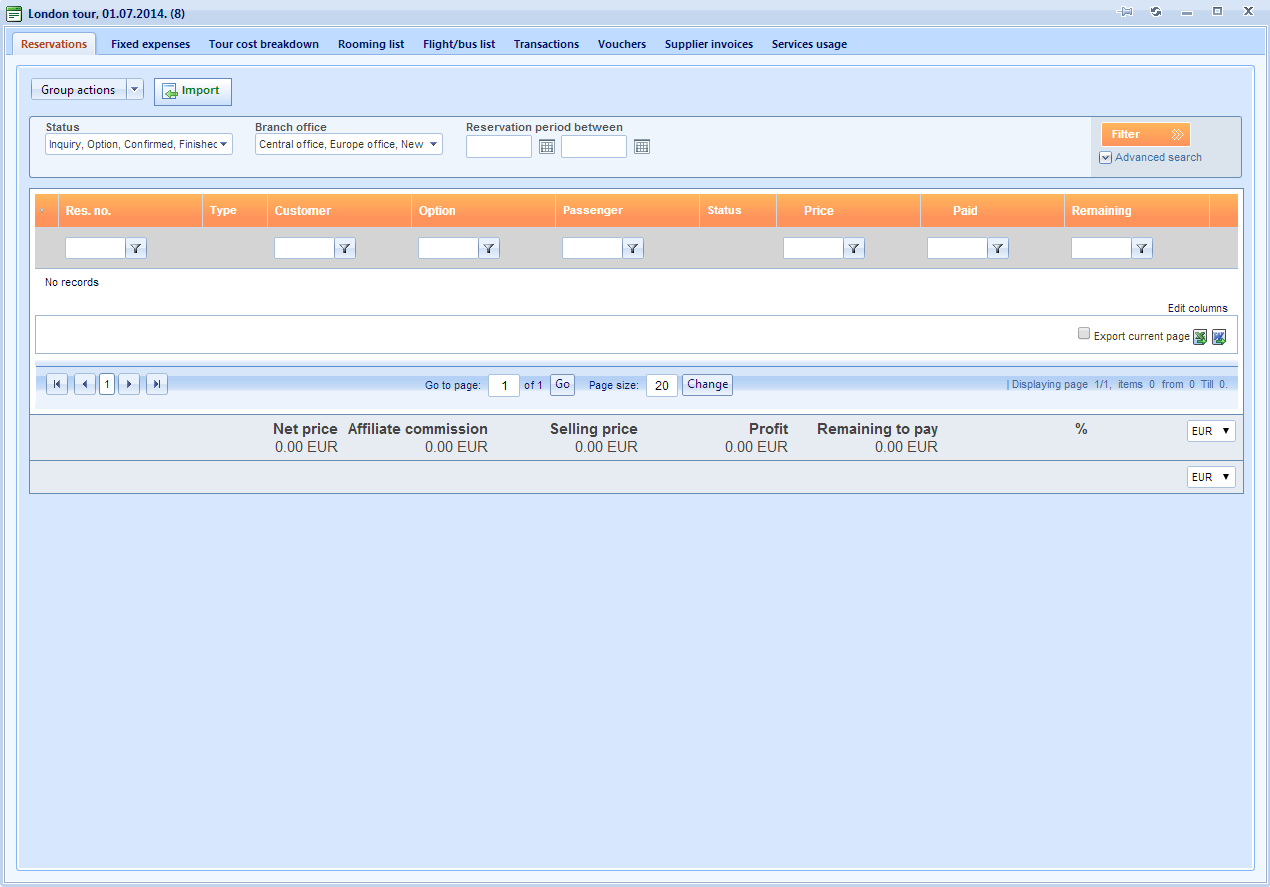
Choose the Fixed expenses tab.
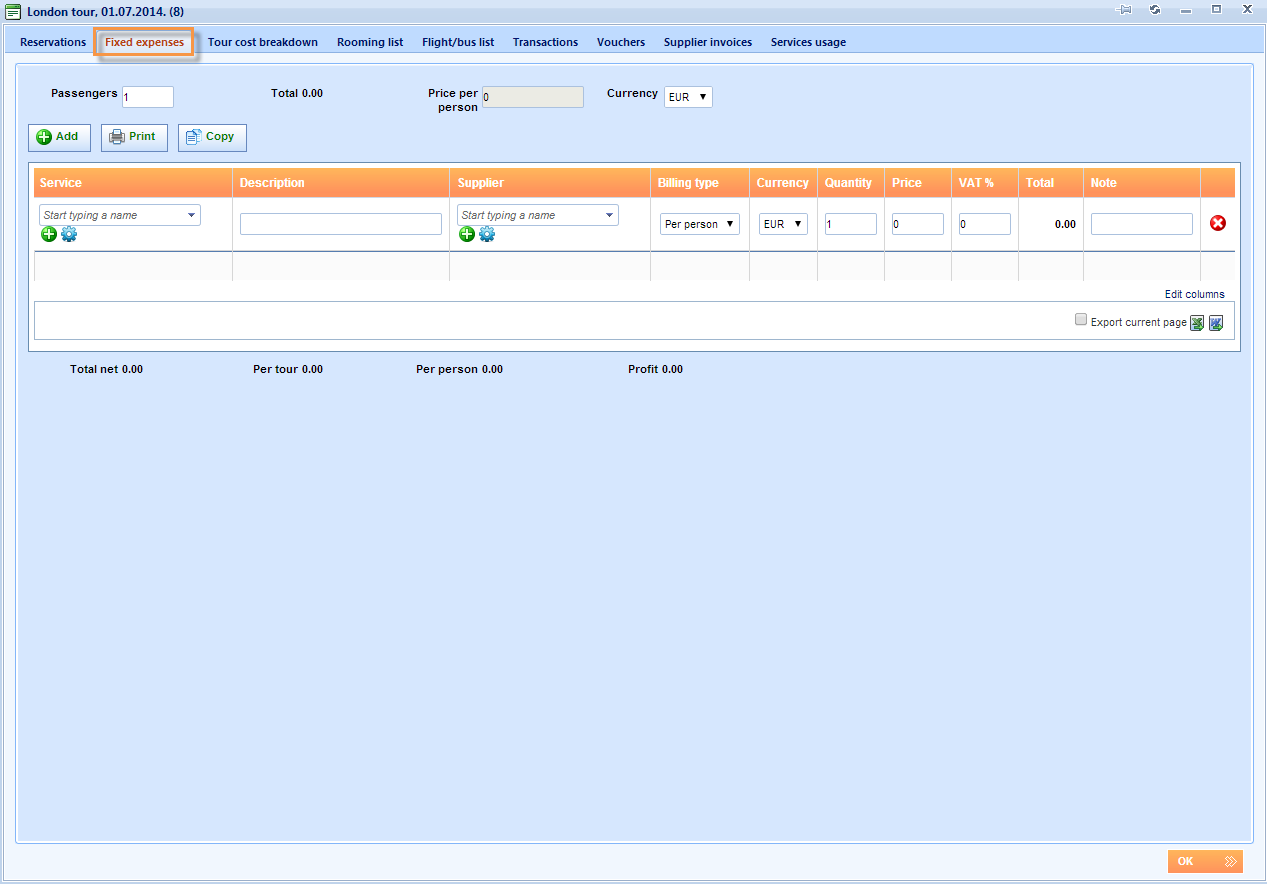
In the grid with the expense items enter the data about the expense item. Let’s enter e.g. flight as the fixed expense. It will not going to be priced per person, but defined as the total price. Every person will pay equally, according to the number of total passengers. Define service main information in the Service column, Supplier column, Billing type column and Price column.
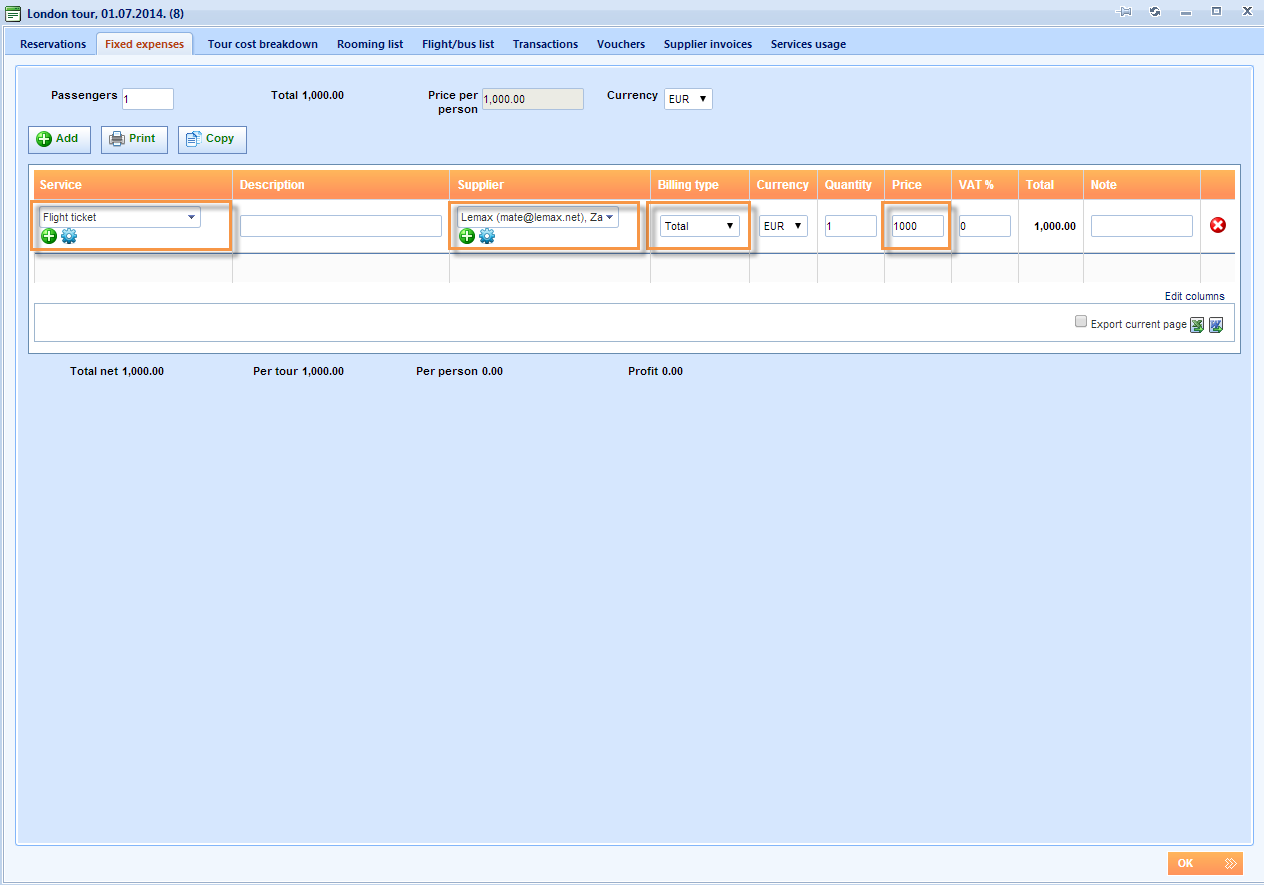
NOTE: If payment method is Per person, the expense entered is something each person needs to cover. If payment method is Total, the expense entered is divided by the expected number of persons on the tour.
NOTE: Use the Add button on top of the grid to add as many expense items as you need.
In the Passengers box define the expected number of passengers on this departure. Total expense is divided by the expected number of persons on the tour. Observe how the Price per person box amount is changing according to the changes in the Passengers box. In the Price per person box you will see the Net factor calculated.
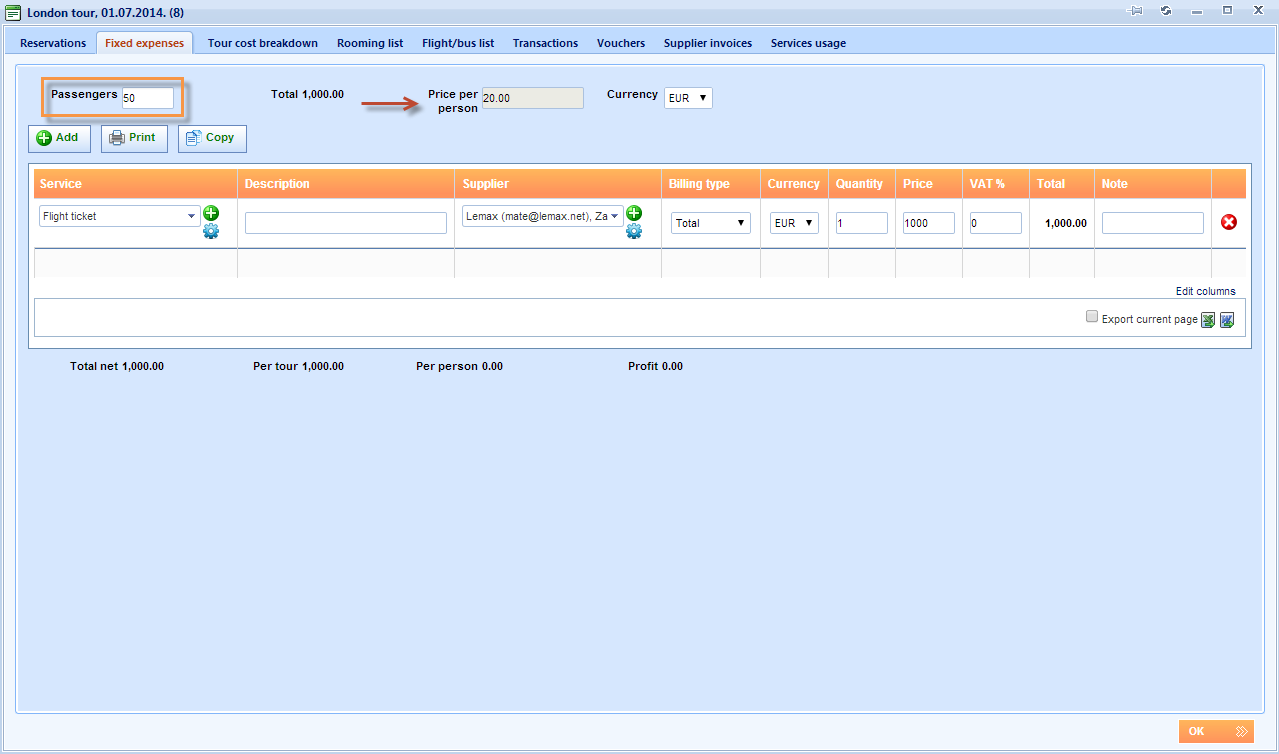
NOTE: The expected number of passengers is just a number that says how many passengers you expect on this departure and how many passengers you base your expense calculation on. It is in no way connected nor will it affect the availability or capacity of the tour.
Click OK button to save defined fixed expenses for the first departure.
You should repeat defining fixed expenses for each departure. To easily do it, choose .
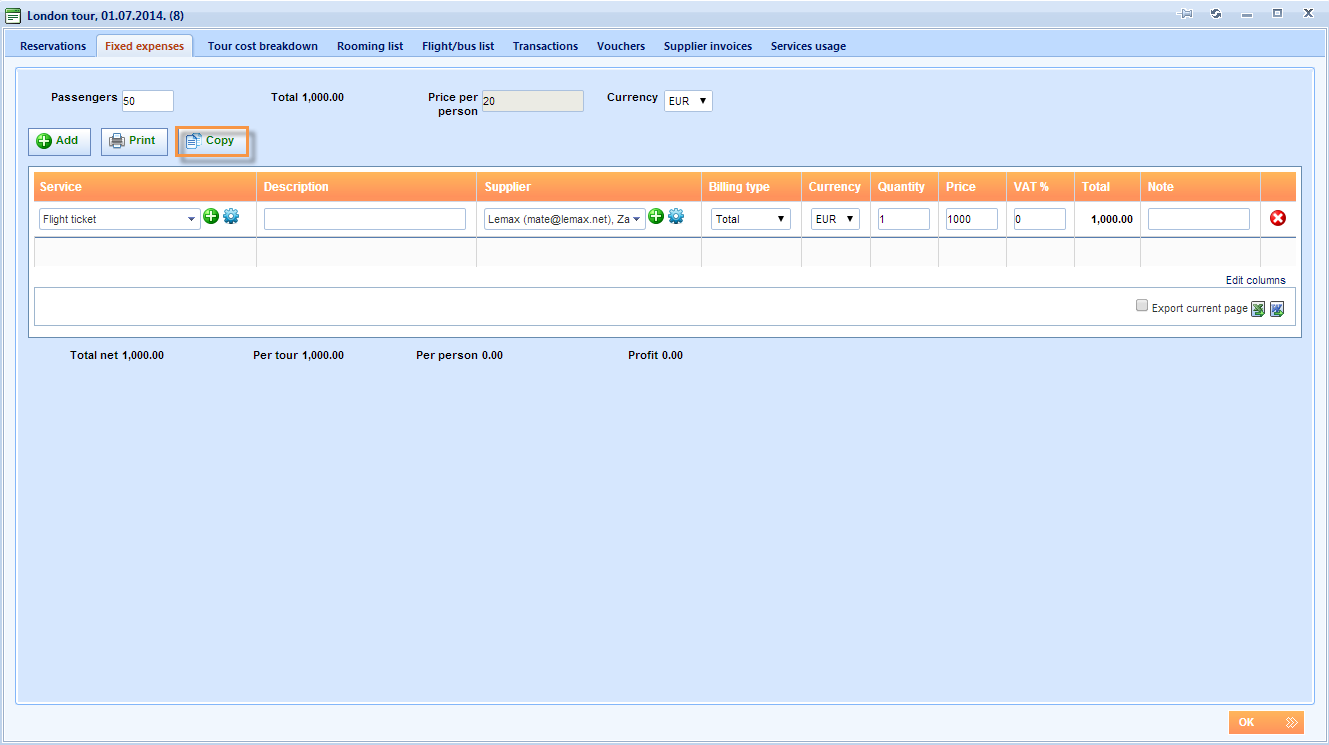
Copying fixed expenses window will open. Choose departures for which you want to apply created fixed expenses by selecting them in the first column. Click to copy them.

Click to save defined fixed expenses.
Fixed expenses will be added to net prices of the hotel as the total net price. You should define total selling price of the tour with entering an advanced tour price list.
Close window with tour departure details, but stay in the tour window to continue with price list defining.
Entering an advanced tour price list
The advanced tour price list is generated from the available data, such as the departure group information, the accommodation price lists and the Net factors. It is then possible to customize the advanced tour price list.
The price list allows you to edit prices for the advanced tour. The advanced tour can have different prices depending on the accommodation selected.
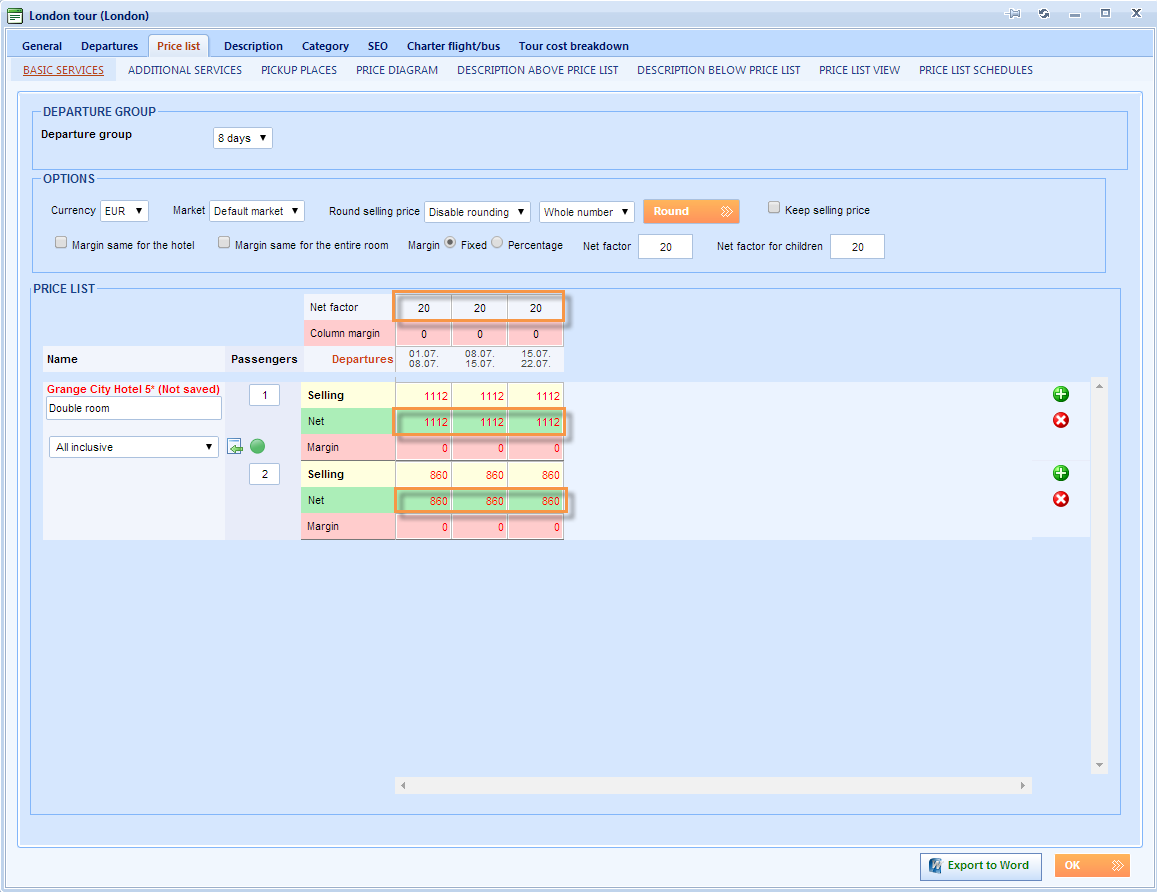
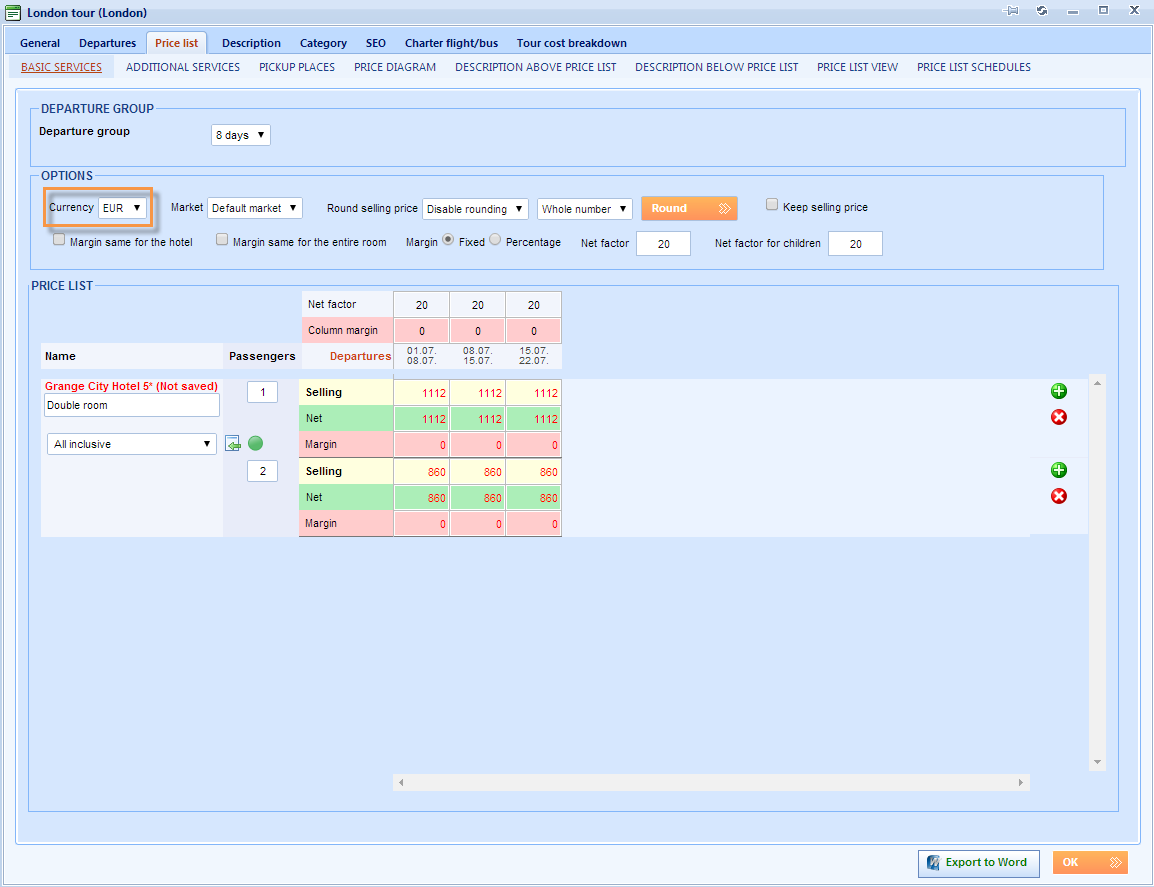
Choose Price list tab in the tour window. The advanced tour price list will be displayed.
NOTE: You need to define the price list for all departure groups. It is necessary to do this one departure group at a time.

Each departure can have different prices. A column in the price list has been created for each departure in the selected departure group. Above each column you can see the Net factor for the departure. This is calculated from the departure expenses.
Initial prices have been filled. The Net price is calculated as the sum of the price of the accommodations in the periods defined by accommodation stages duration, the departure date and the Net factor.
Choose the Currency in which this price list is defined.
You can define your selling prices by adding margins in Margin line. Selling prices will change accordingly.
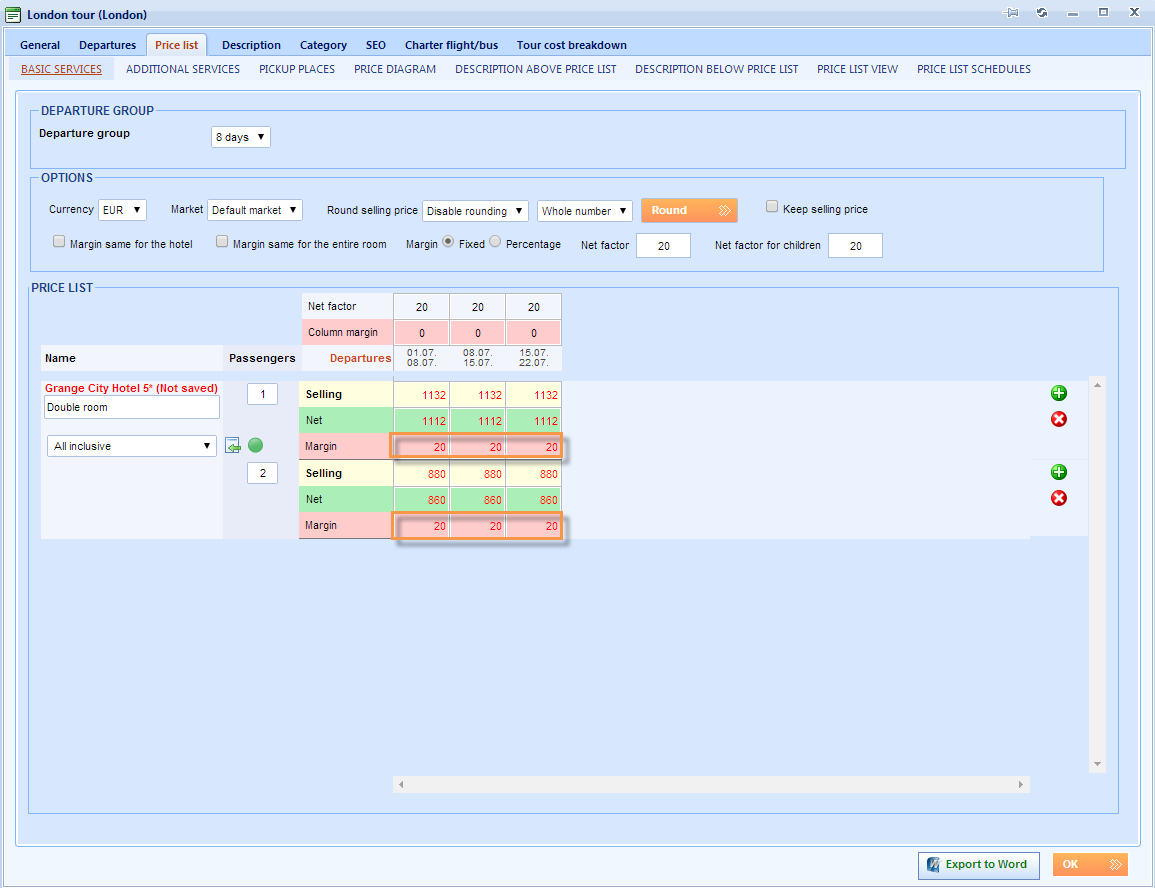
If you want to define selling prices directly, you can set prices manually in the Selling line of the price list. Margins will change accordingly.

Click to save.
You have successfully defined your entire tour consisted out of three departures with charter flights and one hotel.